Hardware Setup
This page covers everything you need to wire and power the Aero Hand Open.
Option 1 (Recommended)
If you purchase the pre-assembled hand, choose this option—no extra parts required.
If you assembled the hand yourself, we strongly recommend using our PCBs and power supply for the fastest, most reliable setup: Order PCBs · Order Power Supply
If you bought everything from us, you can skip the rest of the page.
Option 2 (For advanced DIY)
Prefer to manufacture and solder the PCBs yourself? All fabrication files are in the PCB folder.
Option 3 (For hardcore DIY)
Hand-wire everything using protoboard and connectors (Molex 3‑pin, JST). This requires careful soldering and may not support peak current for all motors. You will need:
- Protoboard
- Molex 3-pin connectors (for servos)
- JST connectors
- Servo cables
- Soldering tools
Once you have all parts, follow the quick-start below (full details are in the Hardware Setup Guide folder).
-
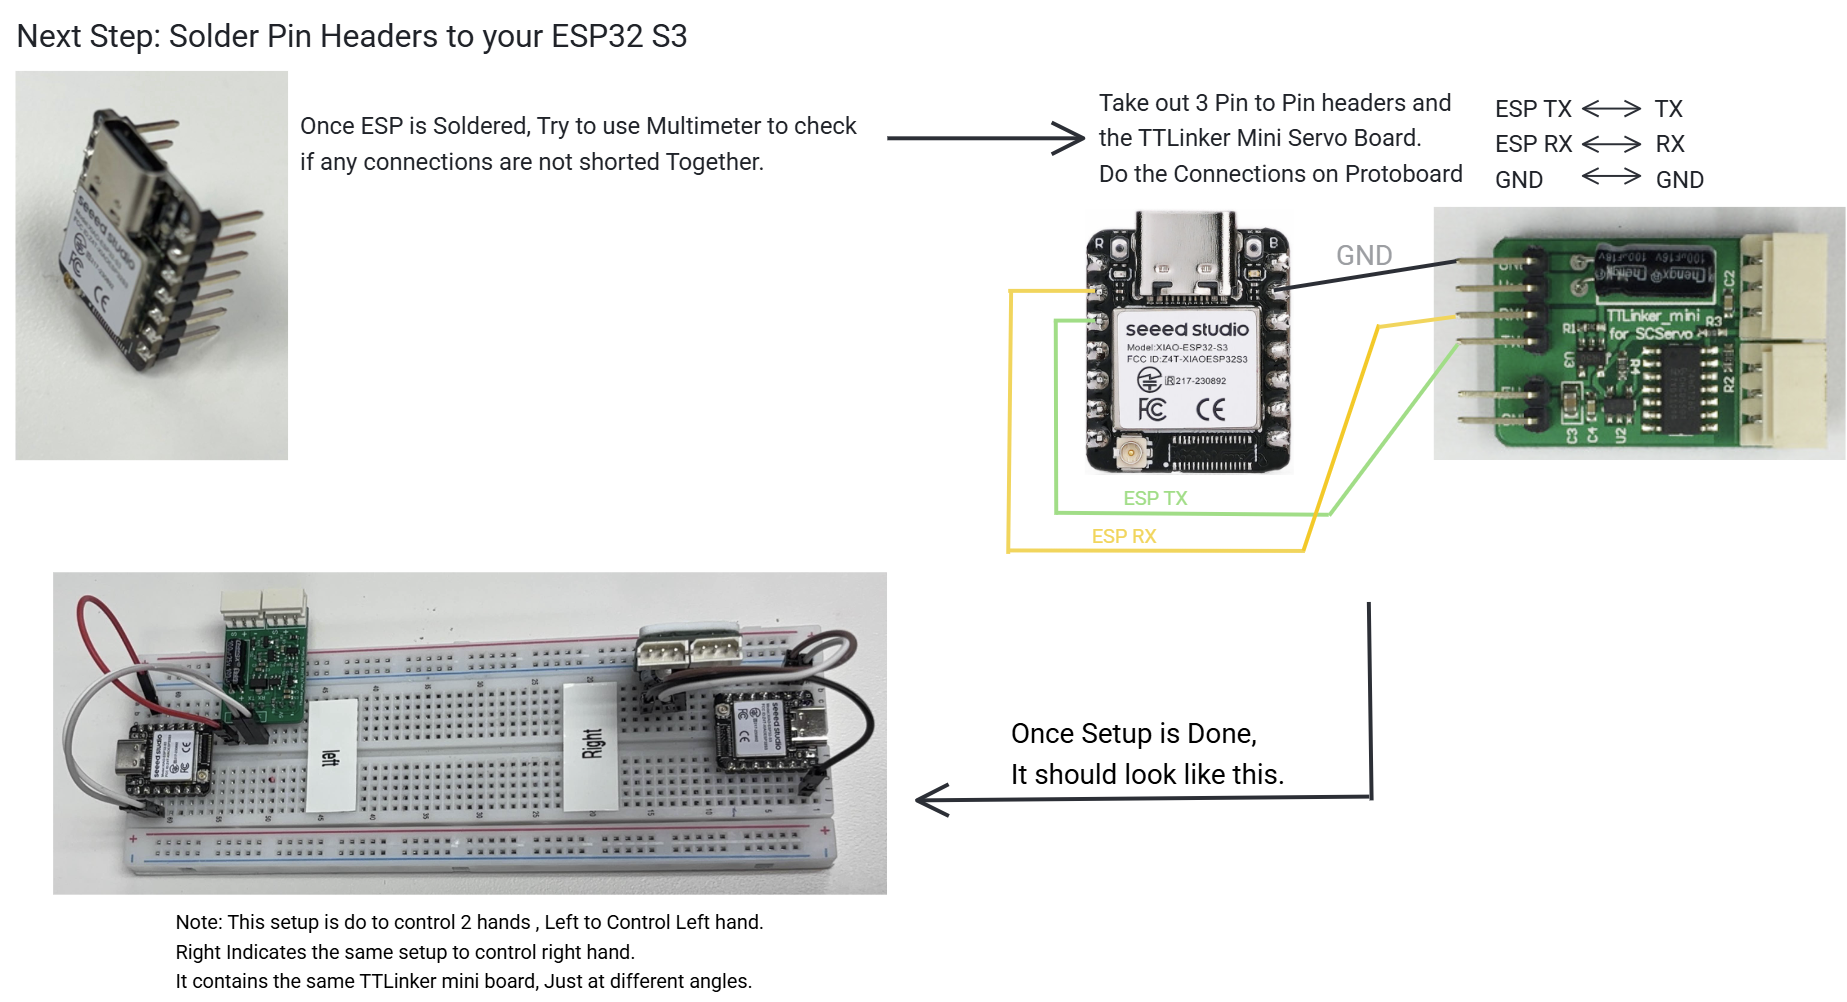
Solder pin headers to the ESP and connect to the TTLinker Mini Board.
-
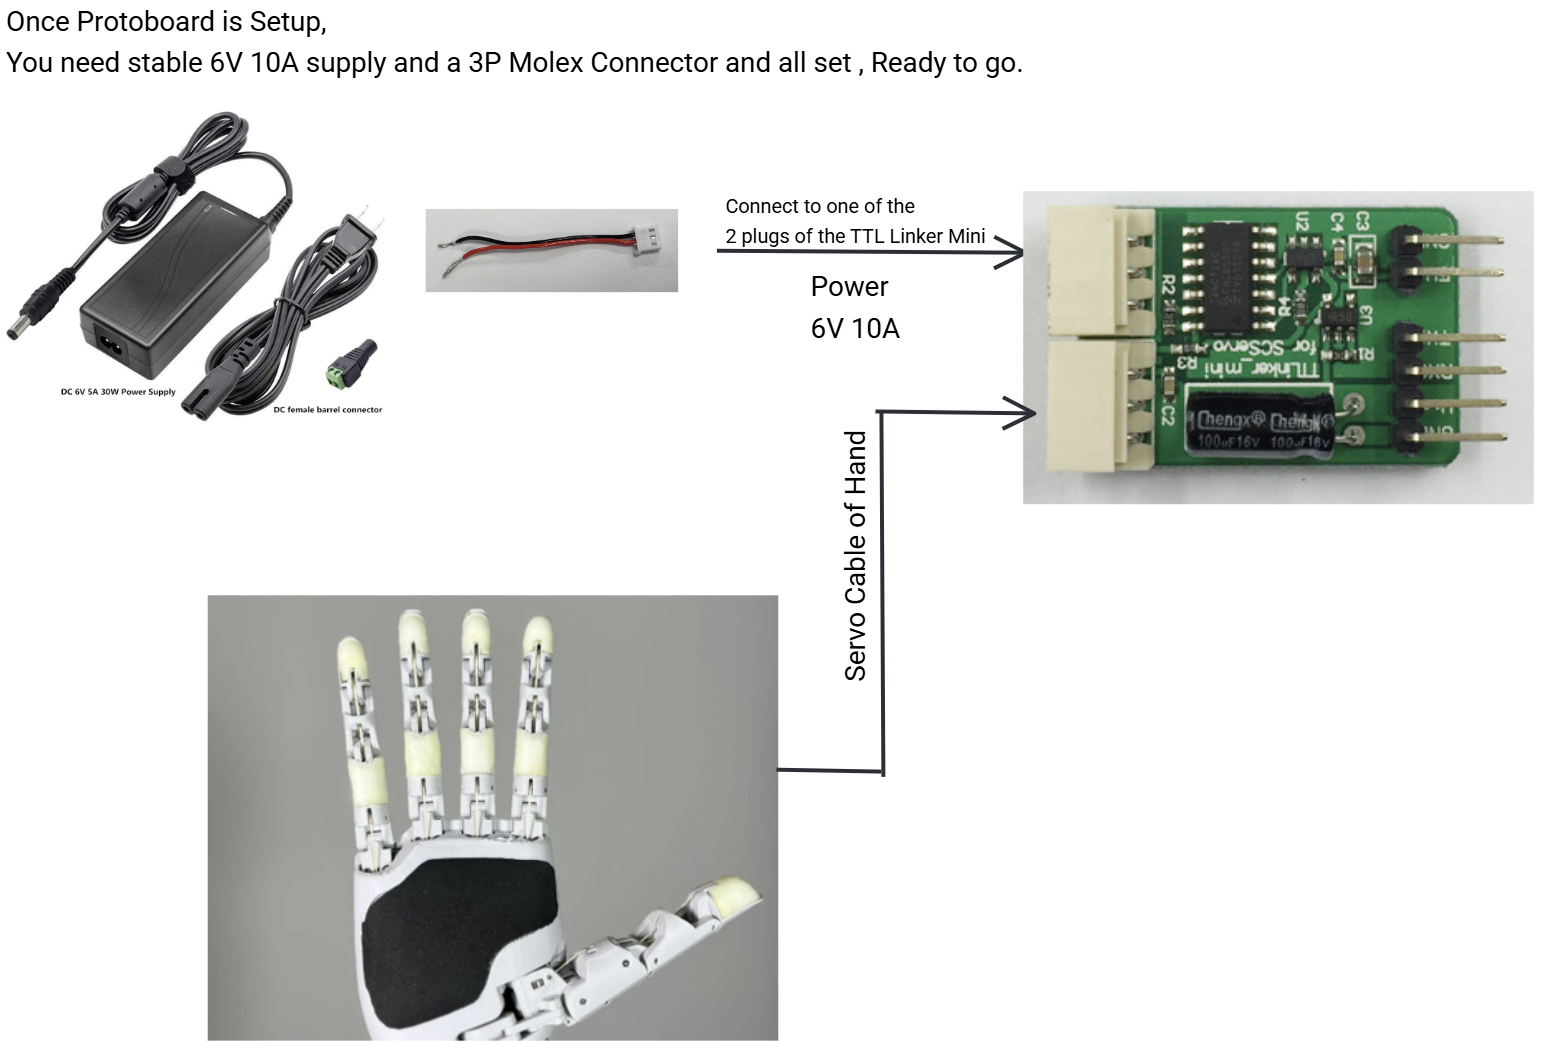
Connect the regulated 6V 10A power supply.
-
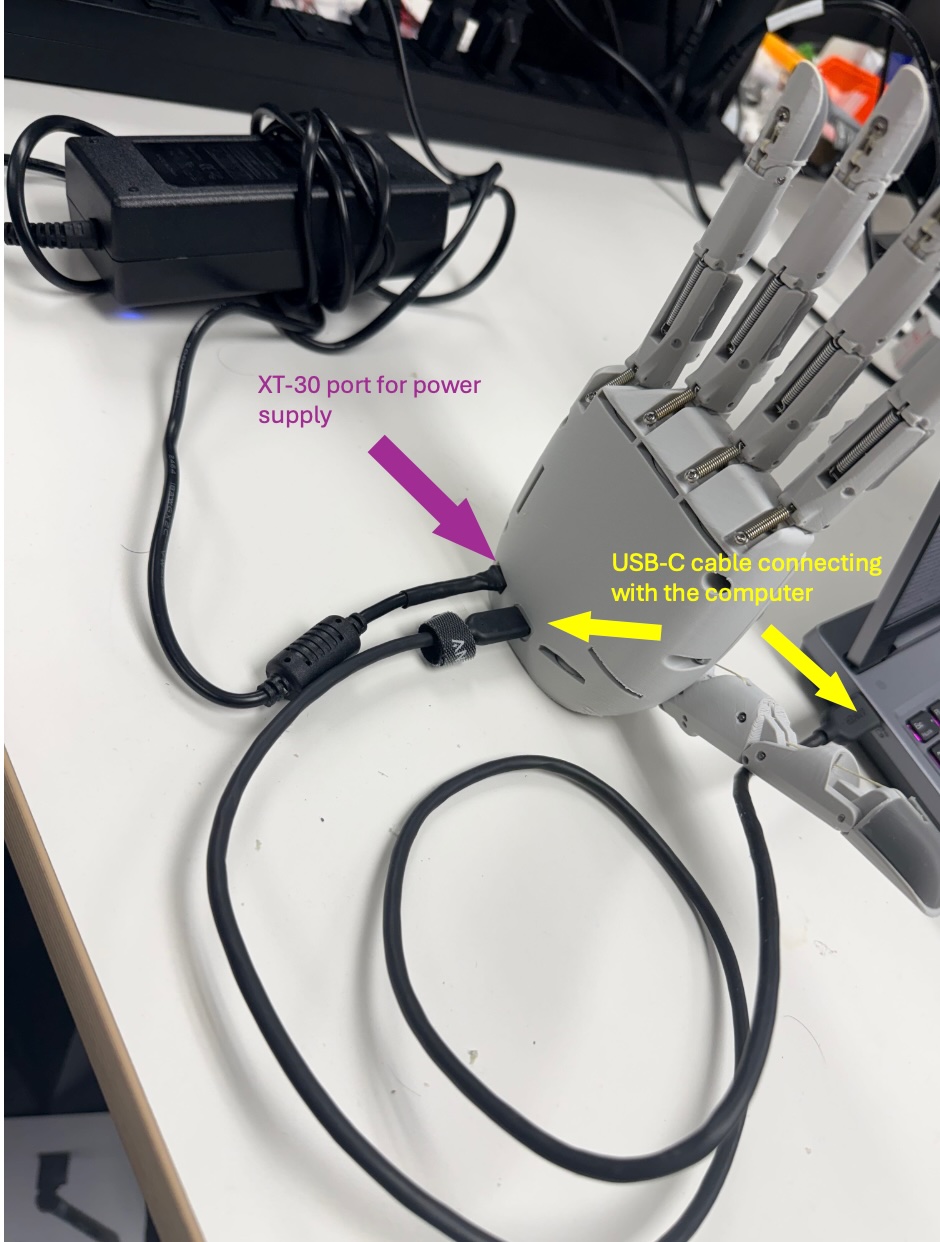
Verify the final layout looks similar to this.

OR if you want to do soldered connections on a board directly instead of using a protoboard, then your connections will look like this.
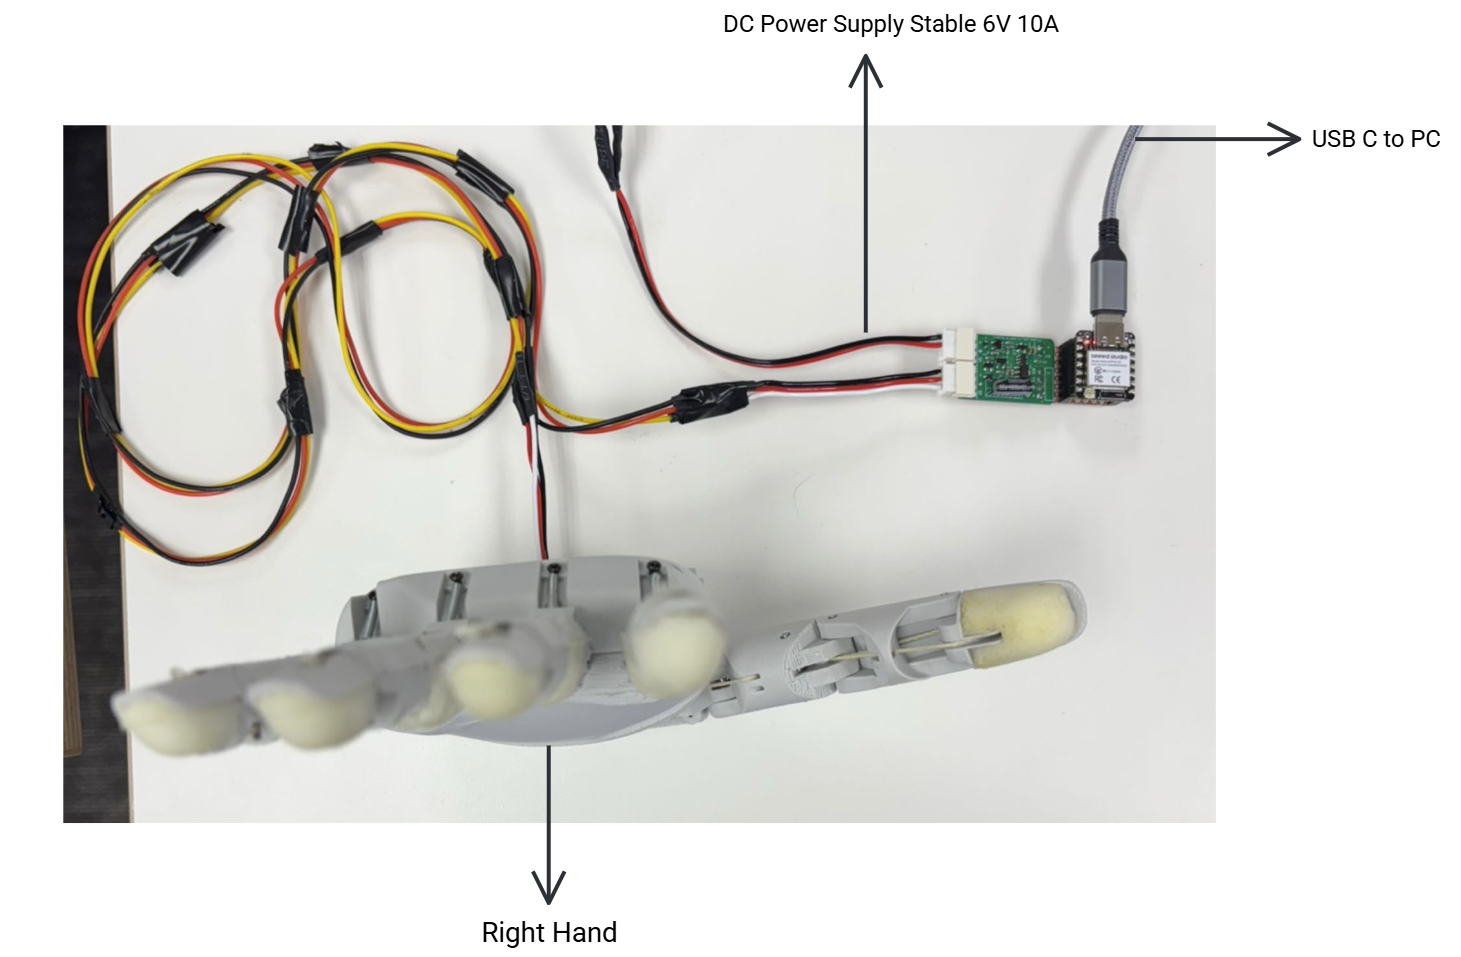
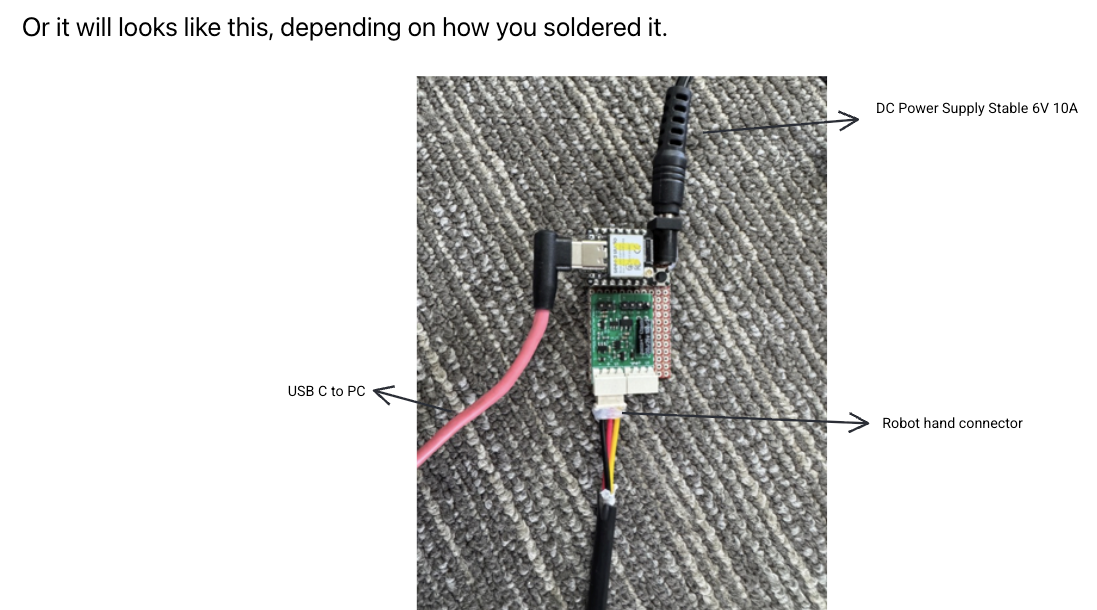
OR it will looks like this, depending on how you soldered it.
If you have any questions, please reach out to our community on Discord.
Made with ❤️ by TetherIA Robotics