SDK
After assembling your hand and setting up the actuators (more on that in the GUI section), you can control your Aero hand using our Python SDK. SDK manages serial communication with the hardware using TetherIA’s custom communication protocol.
Installation
Follow the guideline in software_setup
SDK Overview
The SDK exposes a high-level Python API for commanding, monitoring, and debugging the hand.
Initialization
You can intialize the hand using the AeroHand class:
from aero_open_sdk.aero_hand import AeroHand

aero_hand = AeroHand(port="/dev/ttyACM0")
This will open the serial port for communicating with the hand.
By default, Linux assigns the first connected device to /dev/ttyACM0, while Windows typically uses COM1 or COM2.
However, this is not guaranteed, the exact port may vary depending on your system and connected devices.
Always verify the correct port before initializing the hand.
For detailed steps on identifying and configuring serial ports, refer to our GitHub repository.
Joint Representation
Our Robot Hand has 16 Joints - 4 For the Thumb and 3 for each of the four finger.
Joint Naming and Indexing Convention
We use the following joint naming and indexing convention to refer to each joint in the software. The naming follows standard anatomical terminology, and the indexing flows:
- From thumb to pinky finger
- and from base to tip, within each finger.
| Finger | Joint Name | Index |
|---|---|---|
| Thumb | thumb_cmc_abd | 0 |
| Thumb | thumb_cmc_flex | 1 |
| Thumb | thumb_mcp | 2 |
| Thumb | thumb_ip | 3 |
| Index | index_mcp | 4 |
| Index | index_pip | 5 |
| Index | index_dip | 6 |
| Middle | middle_mcp | 7 |
| Middle | middle_pip | 8 |
| Middle | middle_dip | 9 |
| Ring | ring_mcp | 10 |
| Ring | ring_pip | 11 |
| Ring | ring_dip | 12 |
| Pinky | pinky_mcp | 13 |
| Pinky | pinky_pip | 14 |
| Pinky | pinky_dip | 15 |
To get the joint names programmatically:
print(aero_hand.joint_names)
Expected output:
['thumb_cmc_abd', 'thumb_cmc_flex', 'thumb_mcp', 'thumb_ip', 'index_mcp', 'index_pip', 'index_dip', 'middle_mcp', 'middle_pip', 'middle_dip', 'ring_mcp', 'ring_pip', 'ring_dip', 'pinky_mcp', 'pinky_pip', 'pinky_dip']
Joint Limits
Each joint has a specific range of motion defined by its lower and upper limits.
By convention:
- The minimum angle (0 °) corresponds to a fully extended joint, which translates to an open palm pose.
- The maximum angle corresponds to a fully flexed joint, which translates to a closed fist pose.
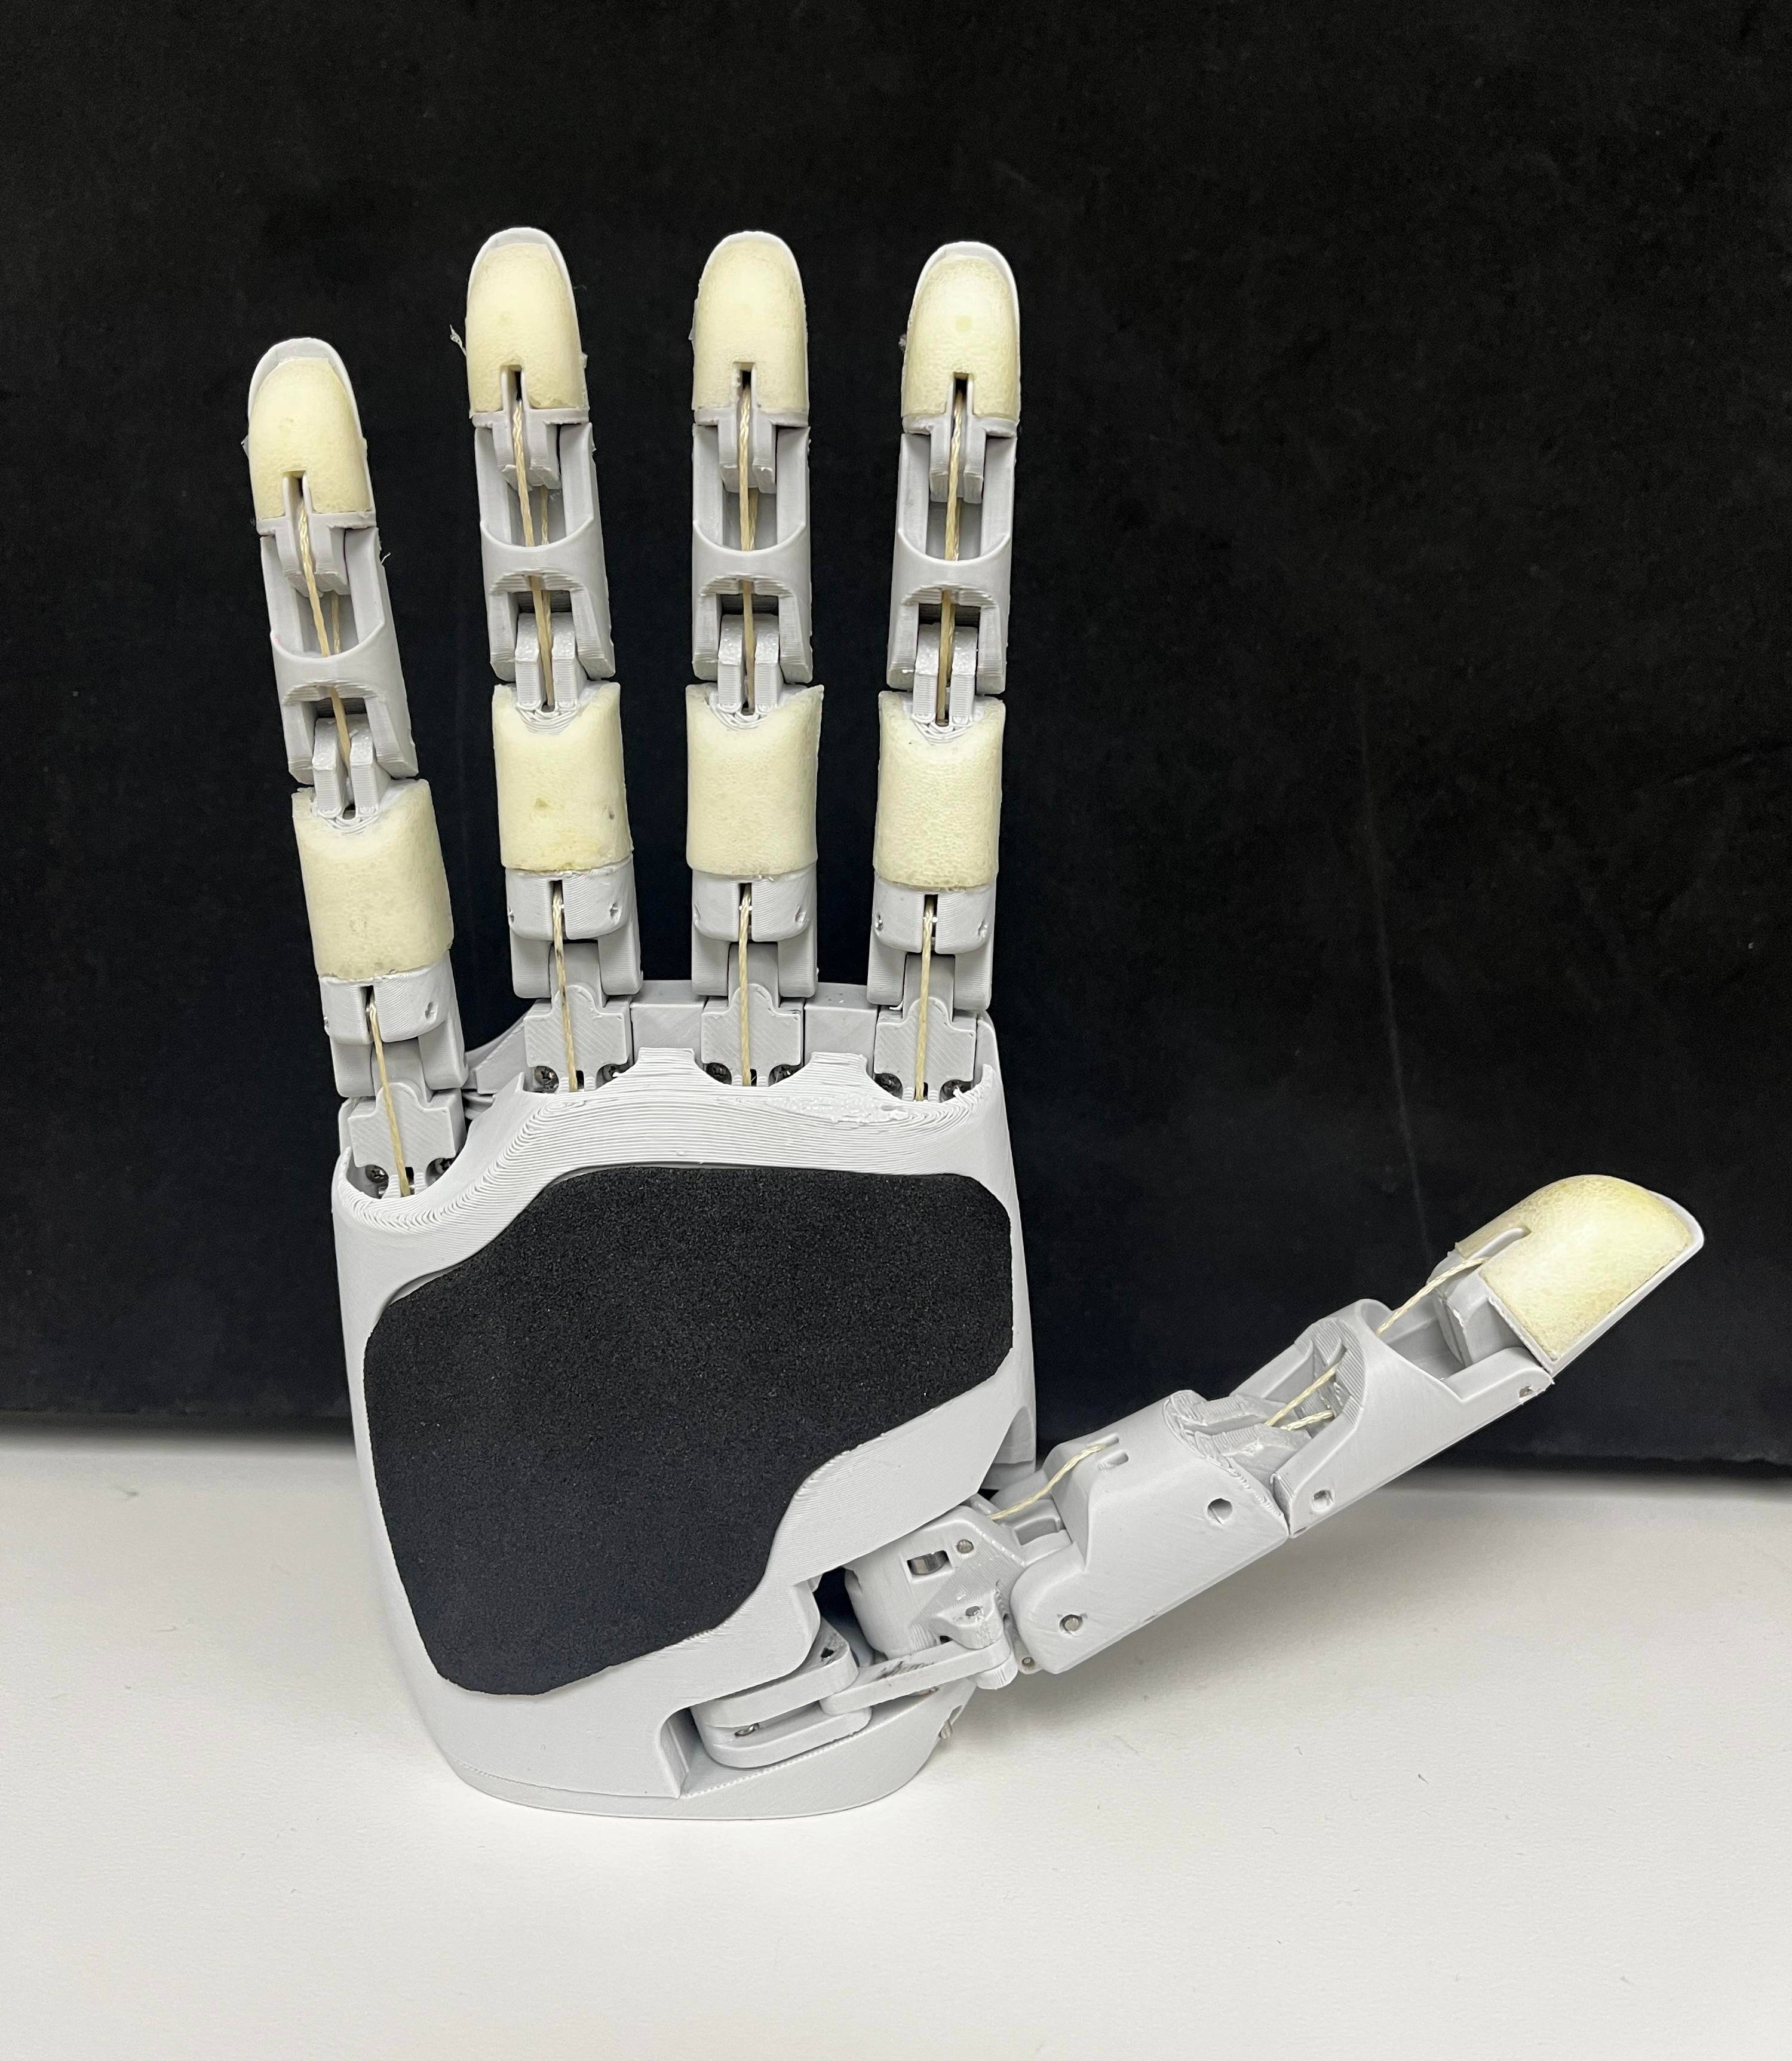
Open Palm Pose(Min Joint Angles)
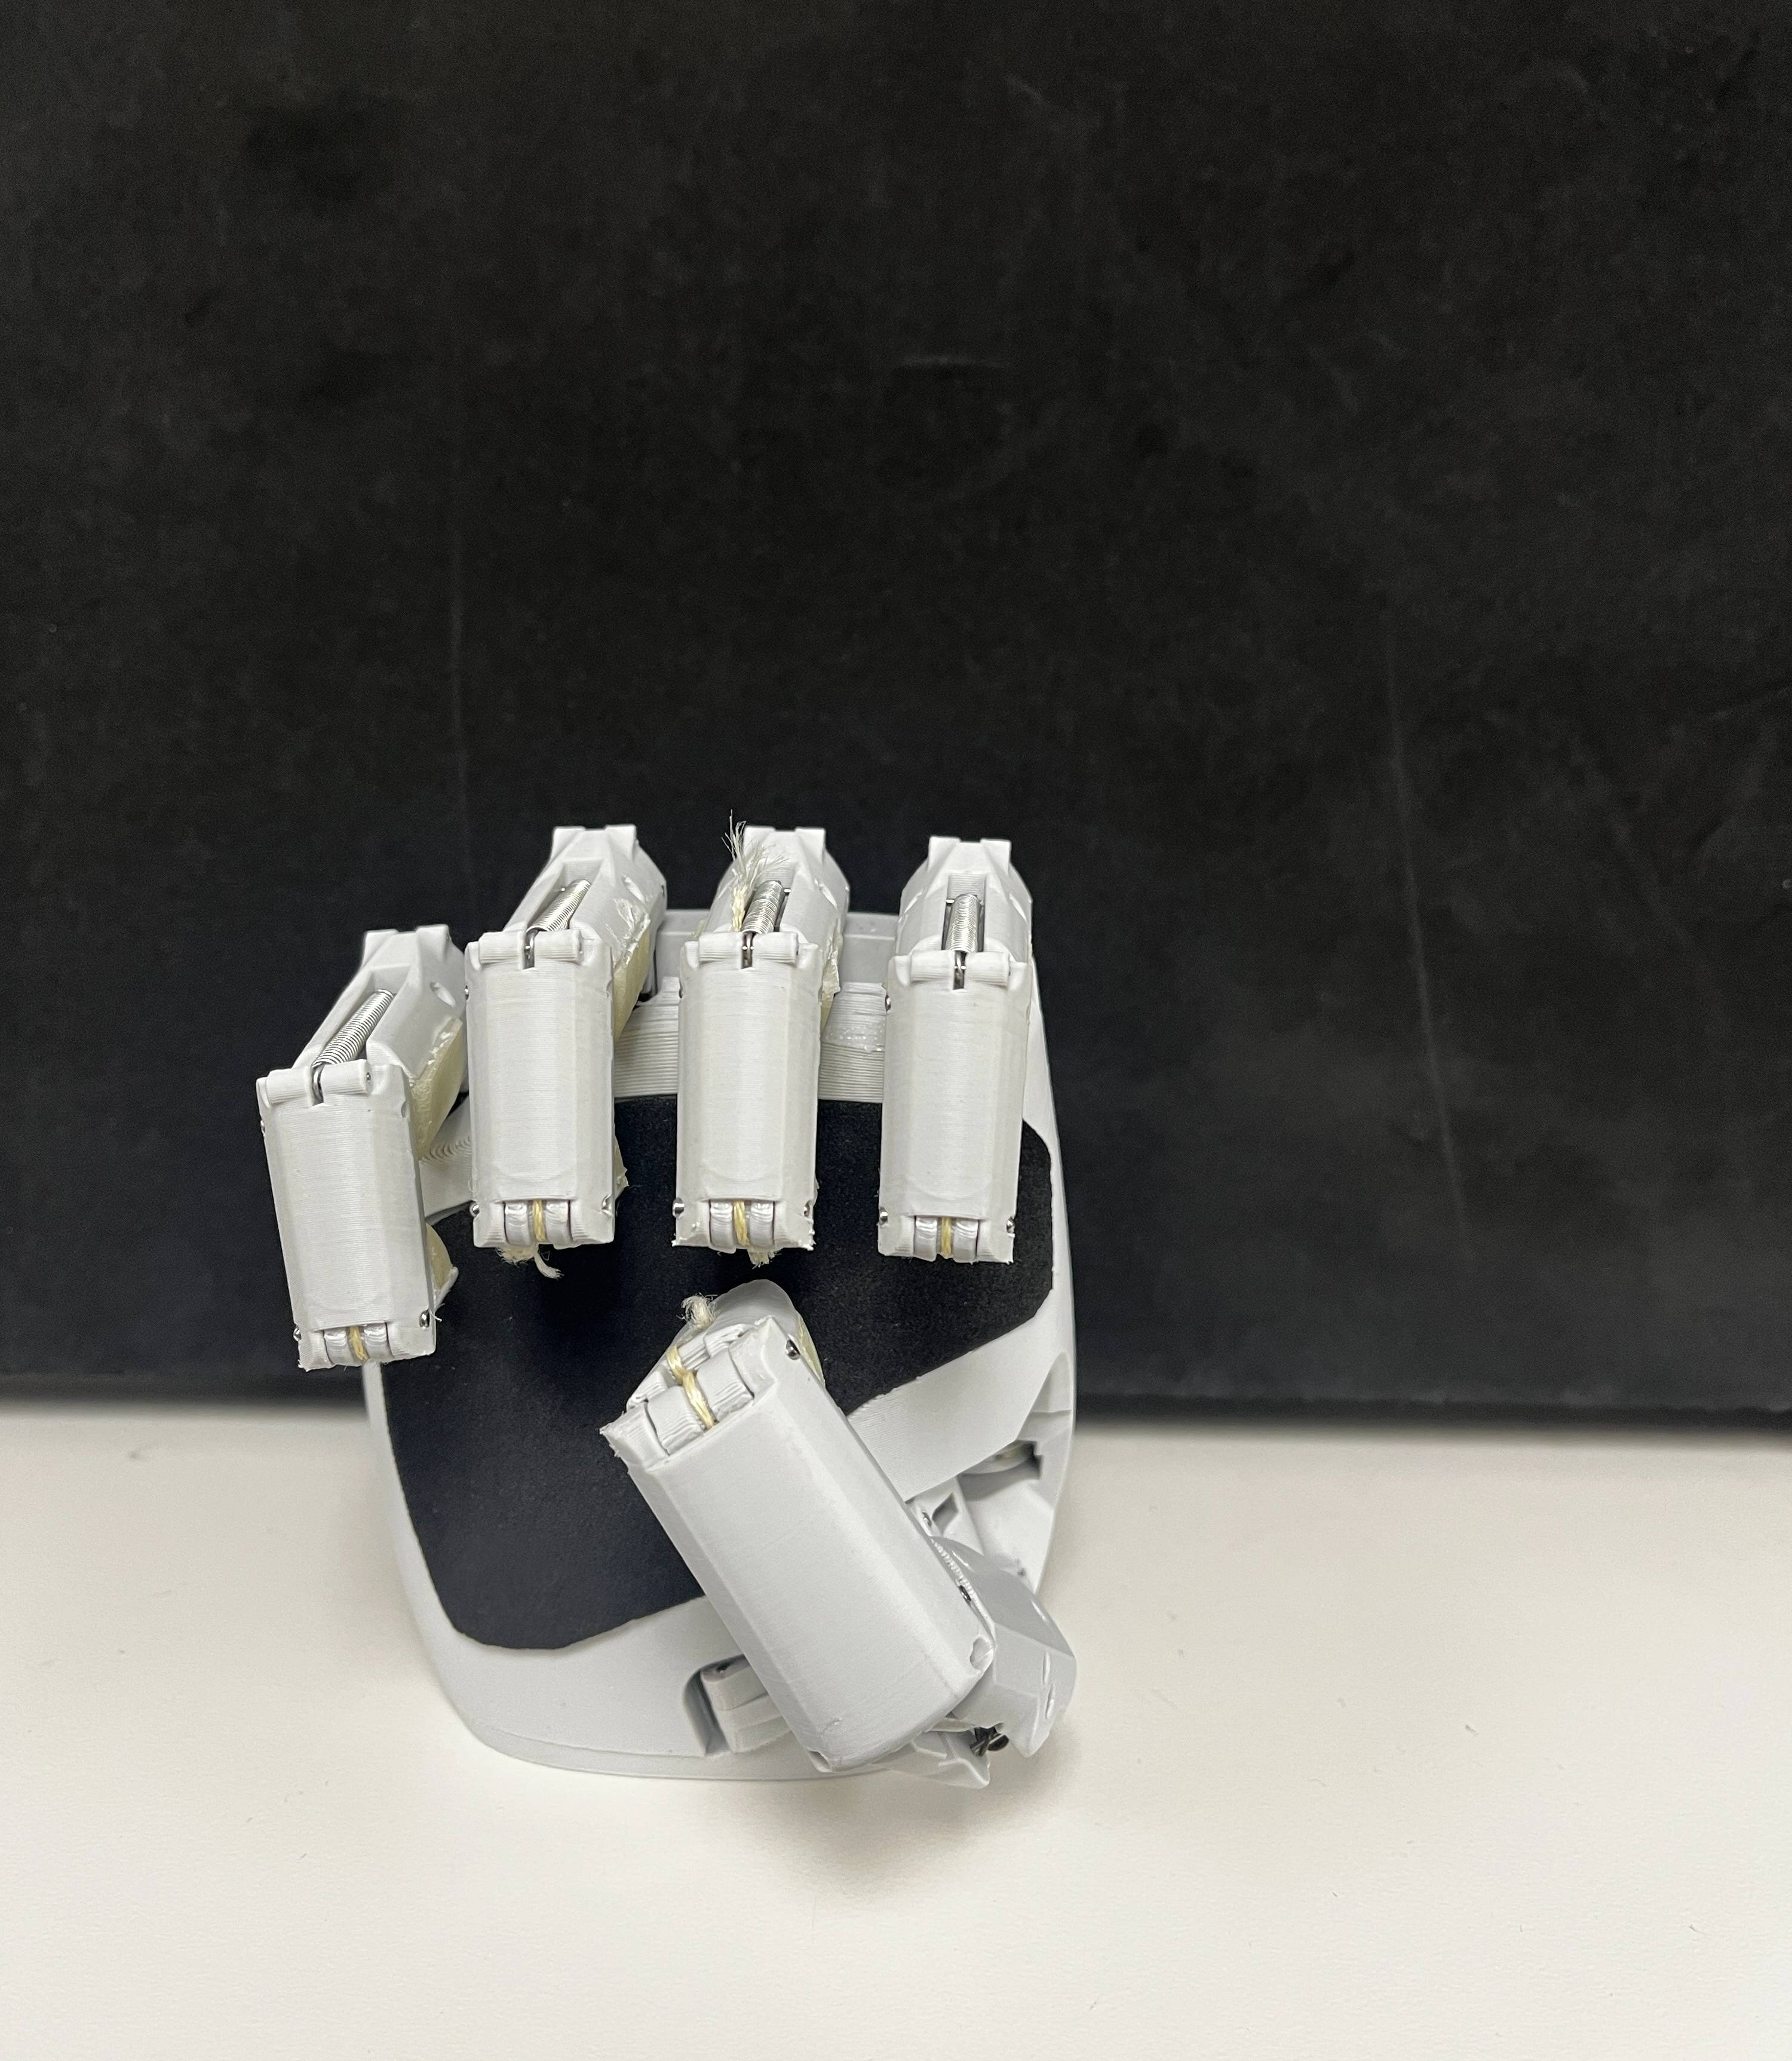
Closed Fist Pose(Max Joint Angles)
These conventions are consistent across all joints for clarity and ease of control.
Each joint's limits in degrees are as per below Table:
| Joint Name | Min (°) | Max (°) |
|---|---|---|
| thumb_cmc_abd | 0 | 100 |
| thumb_cmc_flex | 0 | 55 |
| thumb_mcp | 0 | 90 |
| thumb_ip | 0 | 90 |
| index_mcp | 0 | 90 |
| index_pip | 0 | 90 |
| index_dip | 0 | 90 |
| middle_mcp | 0 | 90 |
| middle_pip | 0 | 90 |
| middle_dip | 0 | 90 |
| ring_mcp | 0 | 90 |
| ring_pip | 0 | 90 |
| ring_dip | 0 | 90 |
| pinky_mcp | 0 | 90 |
| pinky_pip | 0 | 90 |
| pinky_dip | 0 | 90 |
To get the joint limits programmatically:
print(aero_hand.joint_lower_limits)
print(aero_hand.joint_upper_limits)
Controlling the Hand
To control the hand, api expose set_joint_positions method which takes in a list of 16 joint angles in degrees and moves the hand correspondingly.
set_joint_positions method can also take in a list of 7 joint angles(compact representation) in degrees as input. More on that in next section.
target_positions = [30.0, 20.0, 45.0, 45.0, 90.0, 90.0, 90.0, 90.0, 90.0, 90.0, 90.0, 90.0, 90.0, 90.0, 90.0, 90.0]
aero_hand.set_joint_positions(target_positions)
Joints to Actuations Mapping
The hand uses 7 actuators to drive 16 joints through a tendon-driven mechanism, resulting in an under-actuated system where multiple joints are coupled. While we can only control 7 actuators in the hand, we found it useful to think in terms of 16 independent joint angles as many teleoprations systems are designed to work with joints angles. Also, actuators in the thumb are coupled in the sense that movement of one joint affects multiple actuators to maintain the other joint positions.
For example:
- To move only the thumb_cmc_flex joint, we actuate the corresponding actuator. However, this also pulls the tendons that control the thumb_mcp and thumb_ip joints, causing them to move as well.
- Similar coupling exists for the thumb_cmc_abd joint as well, which affects all three actuators in the thumb.
We handle these coupling effects through the joints-to-actuations mapping. Curious users can explore the implementation in the joints_to_actuations.py file for details.
Typically, you won’t need to worry about these coupling effects, as the set_joint_positions() method automatically applies this mapping internally to convert joint angles into actuator commands.
Compact Joint Representation
While using the 16 joint angles to control the hand is descriptive, as the hand only has 7 actuators it can become cumbersome and time consuming to provide all the 16 joint values to the set_joint_positions method all the time.
This is especially true for users who want to define some hand poses manually for making the robot perform a sequence of actions rather then using a teleoperation system.
To handle this, set_joint_positions method can also take in a compact representation of 7 joint angles in degrees as input.
The compact representation consists of the following 7 entries, representing a grouped motion of joints that are controlled by a single actuator:
| Index | Joint Controlled | Description |
|---|---|---|
| 0 | thumb_cmc_abd | single actuator for thumb_cmc_abd |
| 1 | thumb_cmc_flex | single actuator for thumb_cmc_flex |
| 2 | thumb_mcp & thumb_ip | both joints are controlled by one actuator |
| 3 | index_mcp, index_pip & index_dip | All three joints of the index finger are controlled by a single actuator. |
| 4 | middle_mcp, middle_pip & middle_dip | All three joints of the middle finger are controlled by a single actuator. |
| 5 | ring_mcp, ring_pip & ring_dip | All three joints of the ring finger are controlled by a single actuator. |
| 6 | pinky_mcp, pinky_pip & pinky_dip | All three joints of the pinky finger are controlled by a single actuator. |
set_joint_positions method will convert this compact representation to the full 16 joint angles representation internally by copying the values to the joints that are controlled by the same actuator.
Below table shows the internal mapping from 7 to 16 joint angles if the user provides 7 joint angles as below:
| Input (7 joints) | 45 | 30 | 60 | 30 | 45 | 60 | 90 |
|---|---|---|---|---|---|---|---|
| Output (16 joints) | 45 | 30 | 60 60 | 30 30 30 | 45 45 45 | 60 60 60 | 90 90 90 |
The above representation might be more intuitive to some users as the user can think in terms of controlling the fingers as a whole rather than individual joints.
The above example can be intuitively read as:
- move thumb cmc abduction to 45 degrees
- move thumb cmc flexion to 30 degrees
- move thumb mcp and thumb ip to 60 degrees
- move all joints of index finger to 30 degrees
- move all joints of middle finger to 45 degrees
- move all joints of ring finger to 60 degrees
- move all joints of pinky finger to 90 degrees
Programmatically this can be done as below:
compact_target_positions = [45.0, 30.0, 60.0, 30.0, 45.0, 60.0, 90.0]
aero_hand.set_joint_positions(compact_target_positions)
- The joint limits for all the joints will still apply and have similar meaning to the complete 16 joint angle representation.
- Sending the above command doesn't guarantee that the hand will move each joint to the angles specified in the table above, as the hand is under-actuated and the actual position will depend on the external forces acting on the hand.
Actuation Position Control (Advanced)
While we recommend using the set_joint_positions method to control the hand, we also provide the set_actuations method for advanced users who need actuator-level control.
Important: The thumb's CMC abduction, CMC flexion, and MCP-IP flexion are highly coupled by mechanical design. Always keep this coupling in mind when directly controlling the actuations. For example, if you change the thumb_cmc_abd_act value alone, you will observe that all thumb joints (CMC abduction, CMC flexion, MCP, and IP joints) will move due to the coupling mechanism.
We use the below Actuations indexing and Naming conventions to refer to the actuators:
- 0 - thumb_cmc_abd_act
- 1 - thumb_cmc_flex_act
- 2 - thumb_tendon_act
- 3 - index_tendon_act
- 4 - middle_tendon_act
- 5 - ring_tendon_act
- 6 - pinky_tendon_act
This can also be accessed in the code by calling the actuation_names property of the AeroHand class.
print(aero_hand.actuation_names)
Expected output:
['thumb_cmc_abd_act', 'thumb_cmc_flex_act', 'thumb_tendon_act', 'index_tendon_act', 'middle_tendon_act', 'ring_tendon_act', 'pinky_tendon_act']
Similar to joints, each actuator has a specific range of motion defined by its lower and upper limits. Actuations represents the degree of movement of the actuator.
By convention we set the zero actuations to correspond to the open palm pose(zero joint angles) and full actuation to correspond to closed fist pose(maximum joint angles). With this convention and our hand's mechanical design we get the actuation limits as below:
| Actuator Name | Min Actuation (degrees) | Max Actuation (degrees) |
|---|---|---|
| thumb_cmc_abd_act | 0 | 100 |
| thumb_cmc_flex_act | 0 | 131.89 |
| thumb_tendon_act | -27.78 | 274.92 |
| index_tendon_act | 0 | 288.16 |
| middle_tendon_act | 0 | 288.16 |
| ring_tendon_act | 0 | 288.16 |
| pinky_tendon_act | 0 | 288.16 |
Notice that the thumb_tendon_act has a negative lower limit. This is due to the fact that the thumb_tendon is not at it's lower extreme when the hand is in open palm pose(zero joint angles). This is a result of the mechanical design of the hand and the tendon routing. For the curious readers, the lowest actuation of thumb tendon happens when the thumb cmc flex joint is at it's upper limit(55 degrees) and thumb cmc abduction joint is at it's lower limit(0 degrees). This could be calculated using the joints to actuation mapping. You can investigate the joints_to_actuations.py file to understand this in detail.
Actuation limits can be accessed programmatically as below:
print(aero_hand.actuation_lower_limits)
print(aero_hand.actuation_upper_limits)
To control the hand at the actuator level, you can use the set_actuations method which takes in a list of 7 actuation values in degrees.
target_actuations = [50.0, 30.0, 100.0, 150.0, 150.0, 150.0, 150.0]
aero_hand.set_actuations(target_actuations)
Actuation Torque Control
You can directly send torque control command to the seven motors. The torque control only works for the hand closing direction. The control API is hand.ctrl_torque(torque_list).
See more examples in torque control example and position torque switching
We recommend to use switching only when necessary as frequent switching may lead to unexpected behavior. If the hand is not responding as expected, please restart the program and try to do homing before switching modes.
📡 Receiving Data from the Hand
The API also provides methods to read the current state of the actuators via various getter methods.
Get Actuations
To read the current actuator positions in degrees call the get_actuations method.
current_actuations = aero_hand.get_actuations()
This will return a list of 7 actuations in degrees.
Get Actuator Currents
To read the current actuator currents in mA(milliAmpere) call the get_actuator_currents method.
current_actuation_currents = aero_hand.get_actuator_currents()
This will return a list of 7 actuation currents in mA.
Get Actuator Temperatures
To read the current actuator temperatures in degree Celsius call the get_actuator_temperatures method.
current_actuation_temperatures = aero_hand.get_actuator_temperatures()
This will return a list of 7 actuation temperatures in degree Celsius.
Get Actuator Speeds
To read the current actuator speeds in rpm call the get_actuator_speeds method.
current_actuation_speeds = aero_hand.get_actuator_speeds()
This will return a list of 7 actuation speeds in rpm.
Examples
To quickly get started with the SDK, check out the examples in our GitHub repository
Made with ❤️ by TetherIA Robotics